Moist Chocolate Raspberry Genoise
 In an attempt to catch up with the rest of the group I thought I'd squeeze in another cake between the Pumpkin Cake and next week's upcoming cake. I had chocolate on the brain, so chose the Moist Chocolate Raspberry Genoise.
This cake is moist and light and rich, all at the same time. Oh, and deeply chocolaty.
October 17, 2011
Name of Cake: A Chocolaty Contrast in Textures
Occasion: HCB catch up
Constituents: two 9x2 inch layers chocolate genoise, filled and frosted with raspberry ganache
This cake, which doesn't seem like it would take all day to bake, took all day to bake.
Partly because there are lots of steps in this recipe, partly because twice you're supposed to bring something to a boil over low heat which in my kitchen took about an hour each time, and mostly because I needed to take lots of breaks. There's also two one-hour cool downs, and I know, I am whining.
The genoise starts out with the funky instructions to cook over 300 grams of dark chocolate with some water until it reaches a puddinglike consistency. This was the first instance of bringing something to a boil over low heat, and eventually I gave up and cranked up the heat to high whilst vigorously stirring. In mere seconds I got the chocolate to look like pudding. This hot chocolate stuff gets covered tightly, and left to cool down to room temperature (about one hour). In the meantime, I roasted some squash and got the rest of my mise together for the cake.
After the chocolate cools, the eight eggs are whipped up to a lovely fluffy mass. Then the flour is supposed to be sifted over the eggs in three batches and folded in, however I chose not to sift. Because I am stupid. As I watched the flour clump into little balls as I folded, I thought, "oh HELL no. THE DREADED FLOUR BALLS." After the flour is incorporated, the chocolate is folded in and the batter is finished. The cakes bake for about half an hour, during which I ate my squash.
I fumbled one of the cake layers when I was turning it out of the pan in such a way that the cake was a bit deflated and dented even on one side. The other layer looked perfect.
While the cakes cooled, I made the raspberry puree. This is simply defrosted raspberries; the juice is concentrated and the berries are pressed through a fine mesh strainer. I overconcentrated the juice a tad, but I also had more pressed berry mass than called for so I figured that evened everything out. Once the puree is assembled, it can hang out for up to one week in the refrigerator and frozen for even longer.
Next up I made the raspberry ganache. Now this is my most favorite ganache of all time; I love the tangy undertones and slightly reddish color. Usually I am a good girl and I follow the instructions and use the food processor. This afternoon I decided I didn't want to make space on my counter for the processor, nor did I want to clean it up afterwards. So I decided to finely chop the chocolate and stir it together by hand. That also took longer than was necessary. I will totally use the food processor next time, I promise!
At this point, three of four components were made, my sink was full of dishes, and my counterspace all used up. The last component was the cocoa syrup, which also needed to come to a full rolling boil over low heat. While I waited for that to happen I did all my dishes. Then I futzed for a bit until the syrup had come to a decent boil and pulled it off the stove. Instead of adding the optional black raspberry chambord I added a tablespoon of the leftover raspberry puree.
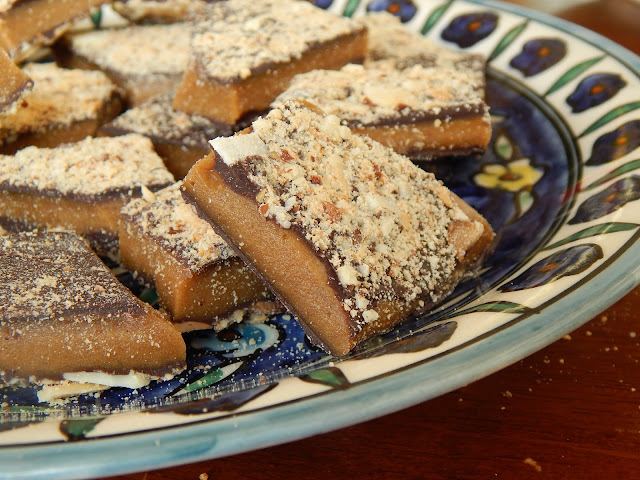
Then it was time to peel off the top crusts of the genoise and split the layers into two. Rose says to save the top and bottom crusts as they can be crumbled and pressed onto the sides of the cake. She says the top crust especially will be sticky (it was) and will need to dry out at room temp for an hour before processing. I found that I needed to dry it out in a 200°F oven for a bit before I could process them into fine crumbs.
As I scraped the bottom crust off I found lots of the dreaded flour balls. I picked put as many as I could, then when I split the cakes into two I found more in the centers of the cakes!! Heed my warning, friends: SIFT THE FLOUR.
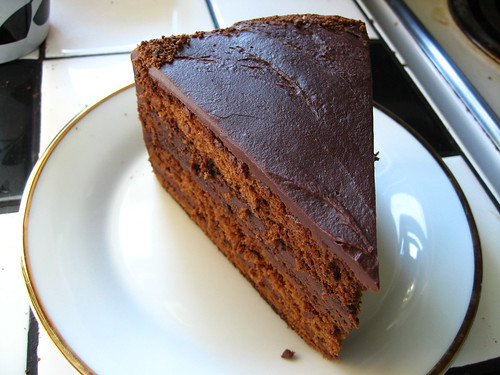
The one genoise cake that deflated a bit made two skinny layers, and without thinking I syruped those first and heavily. By the time I got to the layers from the non-deflated cake there wasn't much syrup left. The third layer down in the photograph below only received a whisper of syrup on only one side, but this genoise really is very moist on its own. The syrup isn't super necessary, methinks.
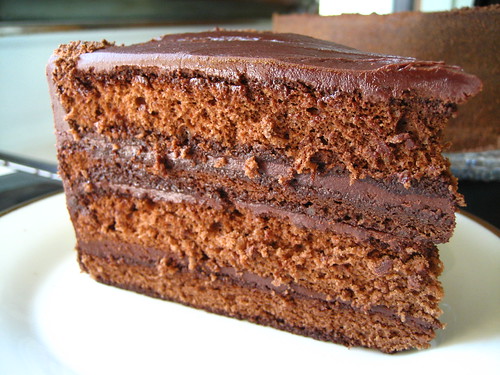
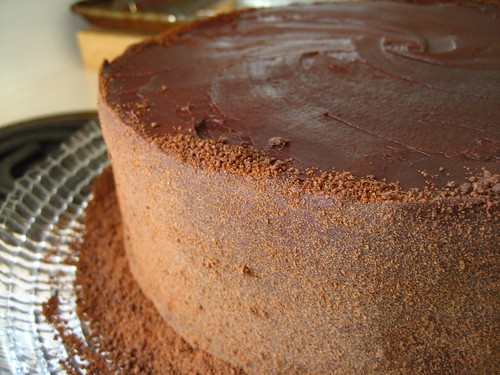
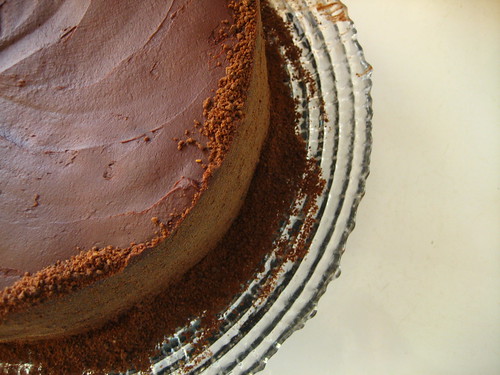
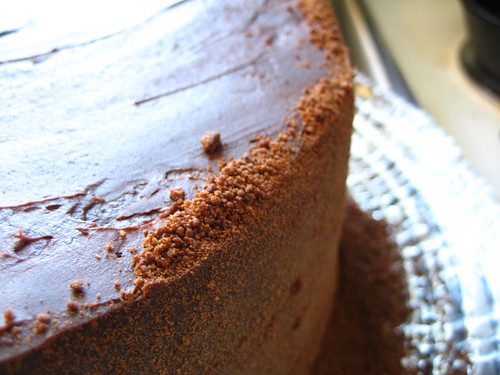
After all the syruping shenanigans it was time to stack and frost. There is just enough ganache to thinly fill and frost this cake, and really a thin layer is all you need. By the time the cake crumbs were dried and processed, the ganache had already firmed itself up enough that the crumbs didn't really stick. They do give a nice visual texture to the cake which I am in favor of. I think the leftover crumbs will mix nicely in some vanilla yogurt, or sprinkled on top of some ice cream.
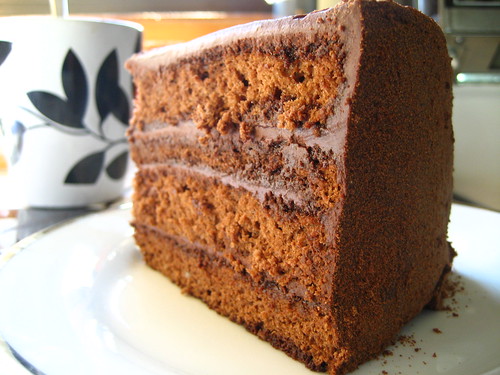
The cake really is soft, and rich, and light, and moist. I love how Rose can juxtapose such different textures in one cake. Rich and decadent chocolate cake without being heavy, dense, and cloying? Yep, it can happen, so long as you've got Rose to show you how.
Here's Marie's cake from the original bake-through. She has lots of great process photos so go check it out!

ב''ה
ReplyDeleteOoh that looks good. I am going to have to try that soon.
Ah, the curse of the food processor...having to clean it! I feel your annoyance with that. The cake looks so tasty...
ReplyDeleteMendy, I hope you will love it when you do!
ReplyDeleteAmanda, the cake is tasty! Gonna be in Portland in the next couple of days? I have half a cake left :)
The crumbs give the cake a very textural finish - a beautiful appearance. I think I've made this cake, but I don't remember that part. Was there an alternative version where the parts trimmed off were to be nibbled by the baker? ;)
ReplyDeleteLois, exactly. I thought that was what you were supposed to do with the extra bits but lo and behold Rose had other plans.
ReplyDeleteBEAUTIFUL BEAUTIFUL CAKE!!!
ReplyDeleteI love the looks of the cake with the crumb. And here when I saw the pictures I thought those were intentional :).
I am tired, and it seems like I have misread your post.
ReplyDeleteI thought the crumbs were the result of the flour balls. But apparently you did intentionally have the crumbs everywhere, :).
Jenn, I did intentionally have crumbs, but they were supposed to coat the sides of the cake. I did like the look of the crumb pile around the edge as well!
ReplyDeleteI love the way you whine read my mind. I hate cleaning the food processor too. I would also say...nah, I'll whack up the heat, try to get away without sifting,and then curse the flour balls!
ReplyDeleteBut I think your cake look very arty farty and delicious.